When you’re working through a geometry worksheet and see a shape that’s been enlarged or reduced, finding the center of dilation helps you understand where the transformation started. It’s not just about scaling it’s about pinpointing the fixed point that everything else rotates around during the change in size.
What does “finding the center of dilation” mean?
The center of dilation is a single point on a grid from which all points of a figure are stretched or shrunk proportionally. If you’re given a pre-image and its image after a dilation, the center is the spot that stays still while every other point moves along a straight line away from or toward it.
For example, if a triangle gets bigger by a scale factor of 2, and every vertex moves twice as far from a certain point, that point is the center. On a worksheet grid, this usually means plotting both shapes and drawing lines through corresponding vertices to find where they meet.
When would you need to find the center of dilation on a worksheet?
You’ll often come across this task when solving problems involving scale factors, especially in middle school geometry. Teachers use these worksheets to check if students understand how transformations work not just that a shape got larger, but why and from where.
It shows up in real assignments like:
- Comparing original and transformed figures on a coordinate grid
- Determining the scale factor based on distance from a point
- Reconstructing the original position of a shape after a dilation
If you're practicing with hands-on activities, identifying the center helps build intuition for how dilations behave under different conditions.
How do you find the center using a worksheet grid?
Start by labeling corresponding points like A and A', B and B' on both the original and dilated shapes. Then draw lines connecting each pair: AA', BB', CC', etc.
These lines should all intersect at one point the center of dilation. If they don’t, double-check your coordinates or redraw the lines carefully.
Some teachers provide grids with marked axes and tick marks to make this easier. Use them to measure distances and confirm that each point moves the same ratio from the center.
Common mistakes to avoid
One frequent error is assuming the center is at the origin (0,0) without checking. That only works if the problem says so or if the math proves it. Don’t guess.
Another mistake is drawing lines between wrong pairs. Make sure you’re matching identical vertices A to A', not A to B'. Mixing up the order throws off the entire result.
Also, be careful with negative scale factors. They can flip the image across the center, so the lines might extend backward. Still, the intersection point is correct it just looks different than expected.
Useful tips for accuracy
Always use at least two pairs of corresponding points. Using three or more gives you a way to cross-check. If all lines meet at the same spot, you’re likely right.
If the lines don’t converge, recheck your coordinates. A small typo in one point can throw off the whole grid.
Try sketching lightly first. You can erase and redraw if needed. Some students even use colored pencils one color per line to track their work visually.
Next steps: practice with real examples
After trying a few problems, test yourself with real worksheet questions that include answers. Work through them step by step, then compare your results.
Keep a notebook with labeled diagrams. Write down what you did where you drew lines, where they met, and what the scale factor was. This builds memory and makes future problems faster.
When you’re ready, try creating your own dilation on a grid. Pick a center, choose a scale factor, and transform a shape. Then reverse the process: start from the image and find the center again. That’s how you really learn.
For inspiration, explore creative tools like font name to label your drawings clearly and keep your workspace neat.
Quick checklist:
- Label corresponding points correctly (A → A’, B → B’)
- Draw lines between each pair using a ruler
- Look for where the lines cross this is the center
- Verify with at least two pairs; use a third if unsure
- Double-check coordinates before drawing
 Mastering Dilations with Scale Factors on the Coordinate Plane
 Exploring Scale Factor Through Dilation Activities
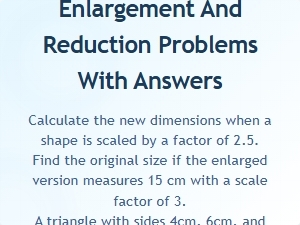 Scale Factor Enlargement and Reduction Practice Problems
 Applying Scale Factor Transformations to Solve Real-World Problems
 Solving Scale Factor Word Problems
 Solving Scale Factor Word Problems in Proportional Reasoning