Using a scale factor on a coordinate plane helps you resize shapes while keeping their proportions. It’s a key part of geometry that shows up in math class, design work, and even when reading maps or blueprints. You’ll use it to make something bigger or smaller by multiplying each point’s distance from a center point.
What does “scale factor” mean on a coordinate plane?
A scale factor tells you how much larger or smaller a shape becomes during a dilation. If the scale factor is 2, every point moves twice as far from the center. If it’s 0.5, each point moves half as far. The center of dilation is usually a fixed point often the origin (0,0) but not always.
For example, if you have a triangle with points at (1,1), (3,1), and (2,3), and you apply a scale factor of 3 from the origin, each coordinate gets multiplied by 3. The new points become (3,3), (9,3), and (6,9). The shape stays the same, just bigger.
When would I need to use a scale factor on a coordinate plane?
You might use it when solving problems in school, especially when working with transformations like enlargements or reductions. Architects and designers use it to scale floor plans. Game developers apply it when resizing characters or objects. Even artists use it when sketching realistic scenes from smaller models.
It’s common in worksheets where you’re asked to draw a new shape based on a given scale factor and center point. These tasks help build understanding of proportion and spatial reasoning.
How do I apply a scale factor step by step?
Start by identifying the center of dilation. Most often, it’s the origin (0,0), but sometimes it’s another point labeled on the grid. Then, for each vertex of the shape:
- Measure the horizontal and vertical distance from the center to that point.
- Multiply both distances by the scale factor.
- Plot the new point using the scaled values.
Repeat for all vertices. Connect the new points to form the dilated image.
For instance, if a point is at (4, -2) and the scale factor is 1.5 from the origin, multiply both coordinates: 4 × 1.5 = 6, and -2 × 1.5 = -3. The new point is (6, -3).
What are common mistakes to avoid?
One frequent error is forgetting to use the correct center of dilation. If you assume the origin is the center when it’s not, your answer will be off. Always double-check the problem or diagram to confirm where the center is.
Another mistake is applying the scale factor only to one coordinate. Always multiply both x and y values unless told otherwise. Also, watch signs negative scale factors flip the shape across the center point, which changes direction.
How can I check my work?
After plotting the new points, compare the original and new shapes. Are they similar? Do the side lengths match the scale factor ratio? For example, if the scale factor is 2, each side of the new shape should be exactly twice as long.
If you’re unsure, go back and verify each multiplication. A quick sketch on graph paper can help catch errors before they grow.
Where can I practice this skill?
Try solving real-world problems involving scale factor transformations. For example, imagine a blueprint where 1 inch represents 10 feet. Scaling a room from the drawing to actual size uses the same idea. You can find these types of problems in real-world application worksheets.
Working through examples with answers helps you see where you went wrong. Check out these practice problems with solutions to test your skills.
How do I find the center of dilation when it’s not obvious?
Sometimes, the center isn’t labeled. In those cases, look at how the shape moved. The center is the point that stays fixed while others shift outward or inward. You can use two pairs of corresponding points the original and the image to find it.
For more detailed steps and visual guides, visit this guide with grid-based examples. It walks through how to locate the center using lines between matching points.
Once you’ve practiced a few times, try creating your own dilation problems. Use a simple shape like a square or triangle, pick a center, choose a scale factor, and plot the result. This builds confidence and sharpens your eye for proportional changes.
When you're ready, grab a pencil, open a grid sheet, and start scaling. Try different factors like 0.5, 1, 2, or -1 and see what happens. Small steps lead to clear understanding.
For inspiration in design, explore creative fonts that follow geometric rules font name offers clean, scalable letterforms that reflect the same principles used in coordinate plane dilations.
 Exploring Scale Factor Through Dilation Activities
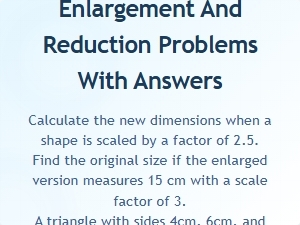 Scale Factor Enlargement and Reduction Practice Problems
 Finding the Center of Dilation From a Worksheet Grid
 Applying Scale Factor Transformations to Solve Real-World Problems
 Solving Scale Factor Word Problems
 Solving Scale Factor Word Problems in Proportional Reasoning